Getting started
Preliminary Steps
- If you haven’t done so already, create an account (for free) at this address: https://app.geartracker.net/auth/register?lng=en
- Prepare a list of your users (name, first name, etc.)
- Gather your equipment list (Excel, CSV format, or simply on paper)
Create or Import Your Data
We will see how to import or create your equipment in the application. Here are the differences between the two methods:
- Data Import: You will import an Excel or CSV file containing your equipment information. This saves time, but it’s important to verify that the data is correct before importing it.
- Data Creation: You will create users and equipment one by one, entering the information manually. It’s time-consuming, but it allows you to review all your equipment and identify inconsistencies in your old data (e.g., equipment that should already be discarded, lost equipment).
Solution 1: Data Import
To import automatically, start by downloading the Excel file template below.
Download Excel Import TemplateThen follow the instructions in the Excel file itself to import your data.
Once finished, send the file to the following address: [email protected] and we will import it for you.
note
Automatic data import is available for users with a subscription as human verification is required to ensure the quality of the imported data.
If necessary, you can invite your users to connect to GearTracker. To do this, go to the Users menu and click the button to edit each user by:
- Adding an Email
- Choosing the role “Editor” or “Viewer” according to your needs
Solution 2: Manual Data Creation
Create Your Users (Optional)
Users are the people to whom you can allocate equipment. It is preferable to create them before the equipment to assign them directly when creating the equipment.
note
Some organizations do not need to create users. For example, when equipment is shared and not allocated to a specific person. In this case, skip to the next step.
Log in to GearTracker, then in the left menu, go to Users, and create accounts for each of your users. Choose the “Without Account” role to not invite them immediately. You can invite them later.
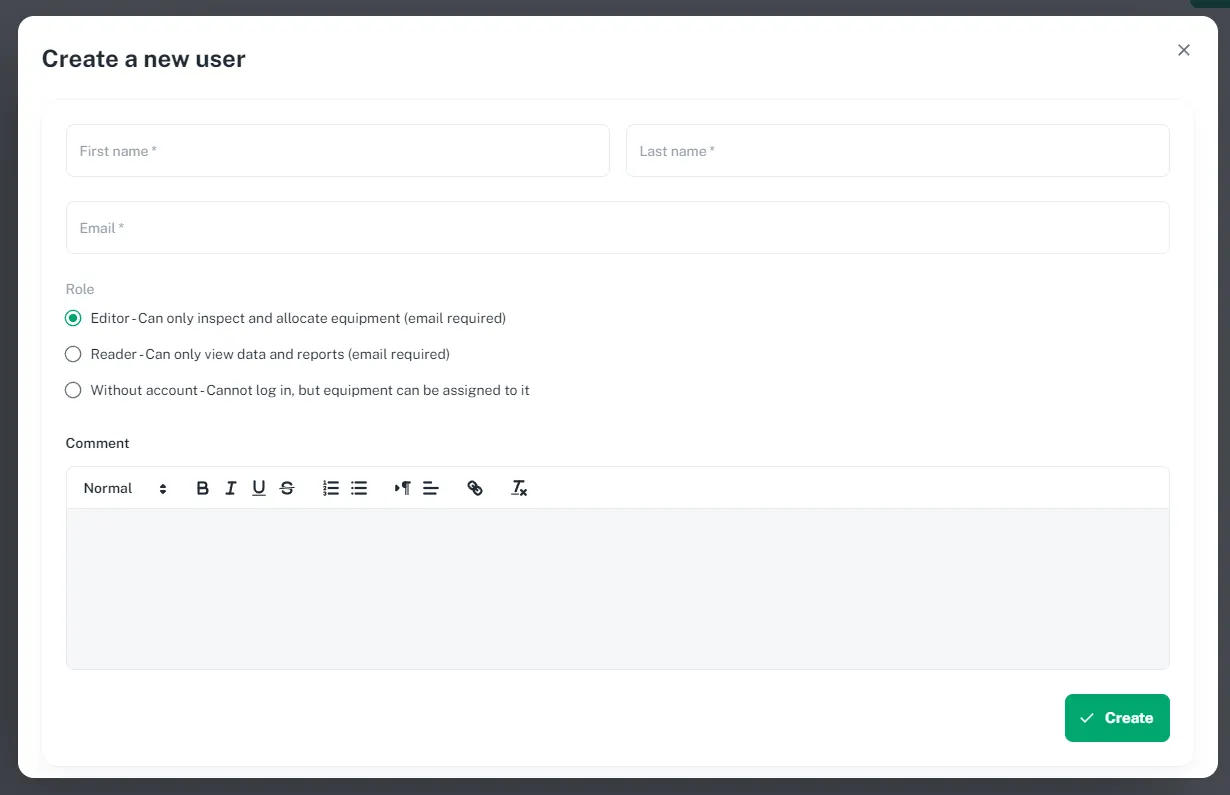
Do this as many times as necessary to add all your users.
Create Your Equipment
Go to the Equipment menu. You will access an empty table that will be populated as you add items.
Click on New Equipment and fill in all the required information. The following information is mandatory:
- Brand
- Model
- Commissioning Date
Then, press Create Equipment at the bottom of the screen. Repeat this procedure as many times as necessary to add all your equipment.
Verify Your Equipment
Go to the Dashboard to check the number and status of your equipment. The status of your equipment is calculated and updated automatically by the application.
Invite Your Users (Optional)
If necessary, you can invite your users to connect to GearTracker. To do this, go to the Users menu and click the button to edit each user by:
- Adding an Email
- Choosing the role “Editor” or “Viewer” according to your needs
Generate Your First Report
Once all the equipment is added, you can generate your first PDF report. To do this, go to the Reports menu, click the “View Report” button, and download the report in PDF format.
Still have some questions? Let's talk
Manage equipment across teams, locations, vehicles, and more! Track the lifecycle of your gear, get access to manufacturer data. Ensure compliance, reduce losses and theft, and save time.